How to Change Checkout Button Text in WooCommerce (Place Order): A Step-by-Step Tutorial

WooCommerce is a powerful e-commerce platform that allows you to create an online store quickly. With its extensive range of features and customization options, you can build a unique and functional online store that meets your business needs. While WooCommerce provides default checkout button, you might want to customize them to suit your brand or to better reflect the desired action.
In this tutorial, we will guide you through the process of changing the checkout button text in WooCommerce. Whether you want to change the text on the checkout button for better clarity or to encourage more conversions, this tutorial will help you which will create a better shopping experience for your customers.
How to change Checkout button text in WooCommerce
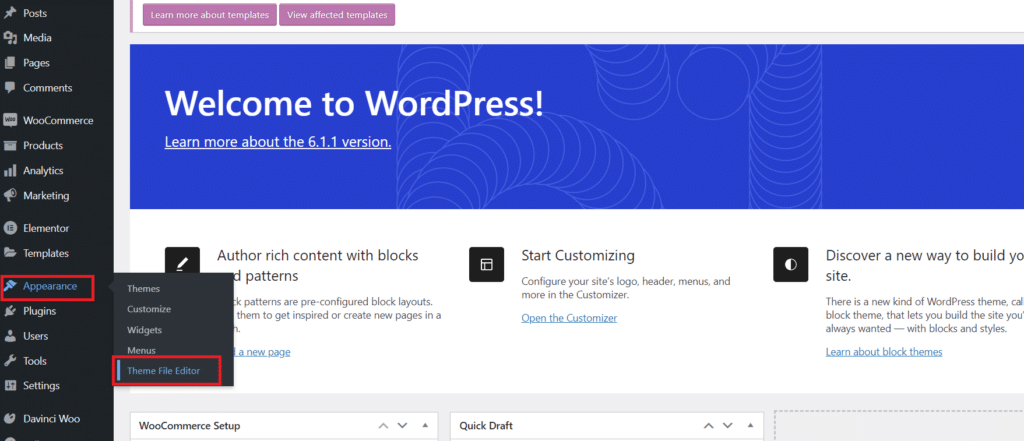
1. Log in to your WordPress dashboard and navigate to the Appearance > Theme File Editor section.
2. Select the functions.php file from the list of files on the right-hand side.
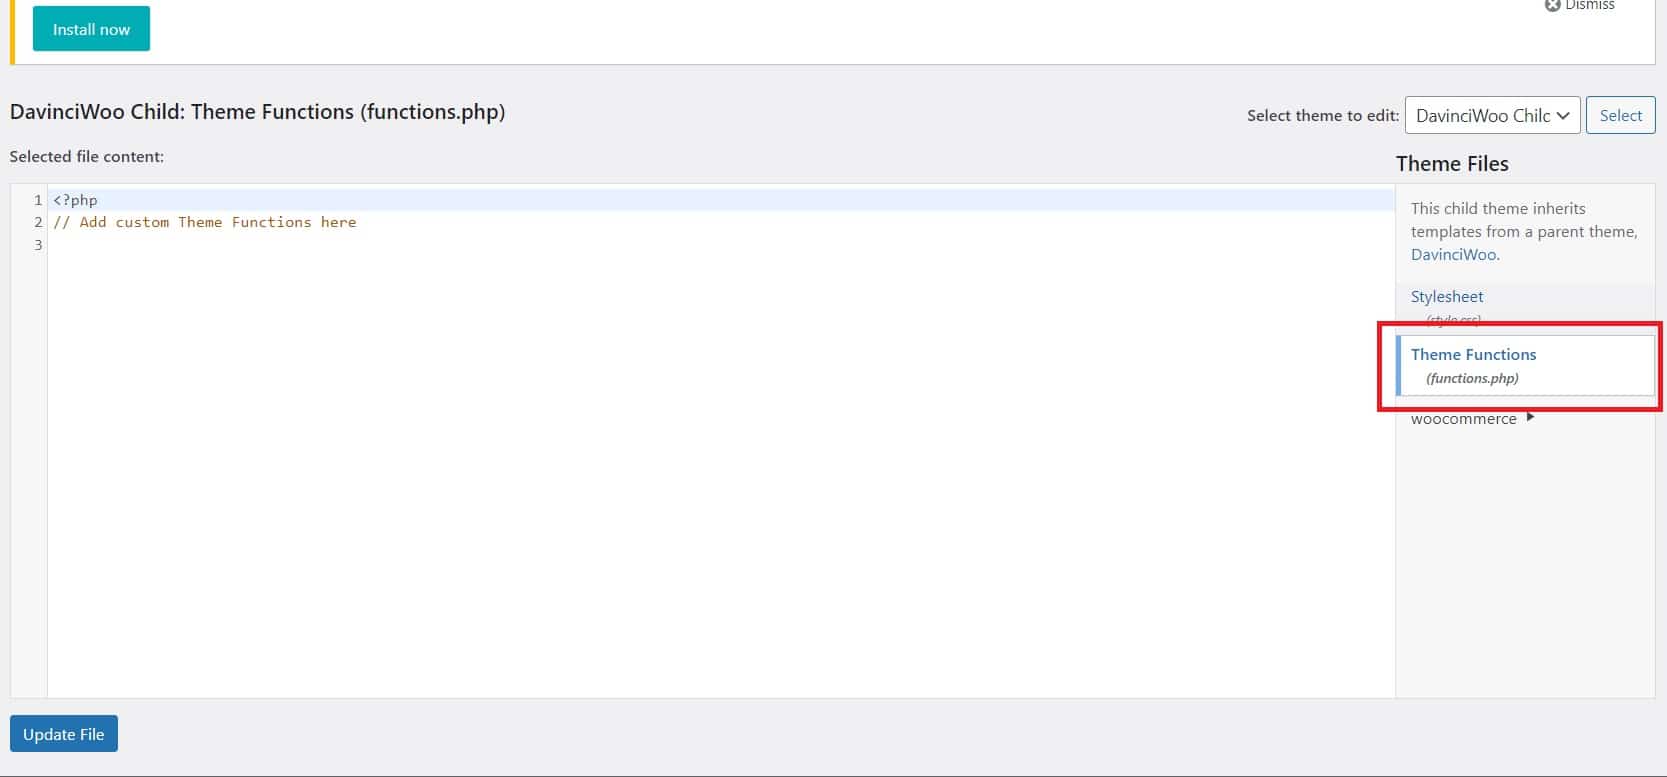
3. Scroll to the bottom of the functions.php file and add the following code:
add_filter( 'woocommerce_order_button_text', 'change_checkout_button_text' );
function change_checkout_button_text( $button_text ) {
    $button_text = 'Your New Button Text'; //your button text goes here
    return $button_text;
}
In this code, woocommerce_order_button_text is the filter hook that allows us to change the checkout button text. change_checkout_button_text is the name of the function that we are defining. Here, We are passing the $button_text variable to this function, which will hold the current text of the checkout button. In the function, we are replacing the current text with “Your New Button Text” and returning the updated text.
4. Replace “Your New Button Text” with the text you want to display on the checkout button. For example, you can change it to “Pay Now” or “Complete Order“.
5. Click on the Update File button to save the changes.
That’s it! The checkout button text should now be updated with the text you entered in the code.
How to Change Checkout (Place Order) Button Text Based on Product ID in WooCommerce
To change the Checkout button text based on the product ID in WooCommerce, you can use a custom function in your theme’s functions.php file. The following tutorial will guide you through the process.
1. To get started, you’ll need to access your theme’s functions.php file. This file is usually located in the wp-content/themes/your-theme directory or or Appearance > theme file editor.
2. Add the custom function Once you’ve opened your theme’s functions.php file, you can add the following custom function to it:
//www.letsknowtech.com
function change_place_order_text( $order_button_text ) {
    global $woocommerce;
    $items = $woocommerce->cart->get_cart();
    foreach ( $items as $item ) {
        $product_id = $item['product_id'];
        if ( $product_id == 123 //Your product id goes here )
			{
            $order_button_text = 'Buy Now'; //Change your button text here
            break;
        }
    }
    return $order_button_text;
}
add_filter( 'woocommerce_order_button_text', 'change_place_order_text', 10, 1 );
In this function, we first get the items in the cart using the $woocommerce->cart->get_cart() method. We then loop through each item and get its product ID using $item['product_id'].
If the product ID matches 123 (you can replace this with the product ID you want to target), we change the Place Order button text to ‘Buy Now’ using $order_button_text = 'Buy Now';. We use the break statement to exit the loop as soon as we find a matching product ID.
3. To get the product ID of the product you want to target, go to the ‘Products’ section in your WordPress dashboard and click on the product you want to edit. In the URL bar, you’ll see something like this: https://yourdomain.com/wp-admin/post.php?post=123&action=edit. The number after ‘post=’ is the product ID. Make a note of this ID as you’ll need it in Step 2.
4. Once you’ve added the custom function to your theme’s functions.php file and replaced ‘123’ with the product ID you want to target, save the changes and refresh your website. The Place Order button text should now be updated for the product ID you targeted.
In conclusion, changing the Place Order button text based on the Product ID in WooCommerce is a simple process that can be achieved with a custom function in your theme’s functions.php file. By following the steps outlined in this tutorial, you’ll be able to customize the button text for specific products in your WooCommerce store.
How to Change Checkout Button Text Based on Payment Gateway in WooCommerce
In this part, we’ll show you how to change the checkout button text based on the payment gateway in WooCommerce.
1. To get started, you’ll need to access your theme’s functions.php file. This file is usually located in the wp-content/themes/your-theme directory.
2. Once you’ve opened your theme’s functions.php file, you can add the following custom function to it:
add_filter( 'woocommerce_available_payment_gateways', 'change_checkout_button_text' );

function change_checkout_button_text( $gateways ) {
    if ( $gateways['cod'] ) {
        $gateways['cod']->order_button_text = 'Confirm Cash on Delivery';
    }
	if ( $gateways['cheque'] ) {
        $gateways['cheque']->order_button_text = 'Confirm Cash Cheque';
    }
    return $gateways;
}
This function uses the add_filter method to modify the order button text for the “Cash on Delivery” and “Cash Cheque” payment gateways. You can modify the payment gateway IDs and button text to suit your needs.
3. Once you’ve added the custom function to your theme’s functions.php file, save the changes and refresh your website. The checkout button text should now be updated based on the payment gateway.
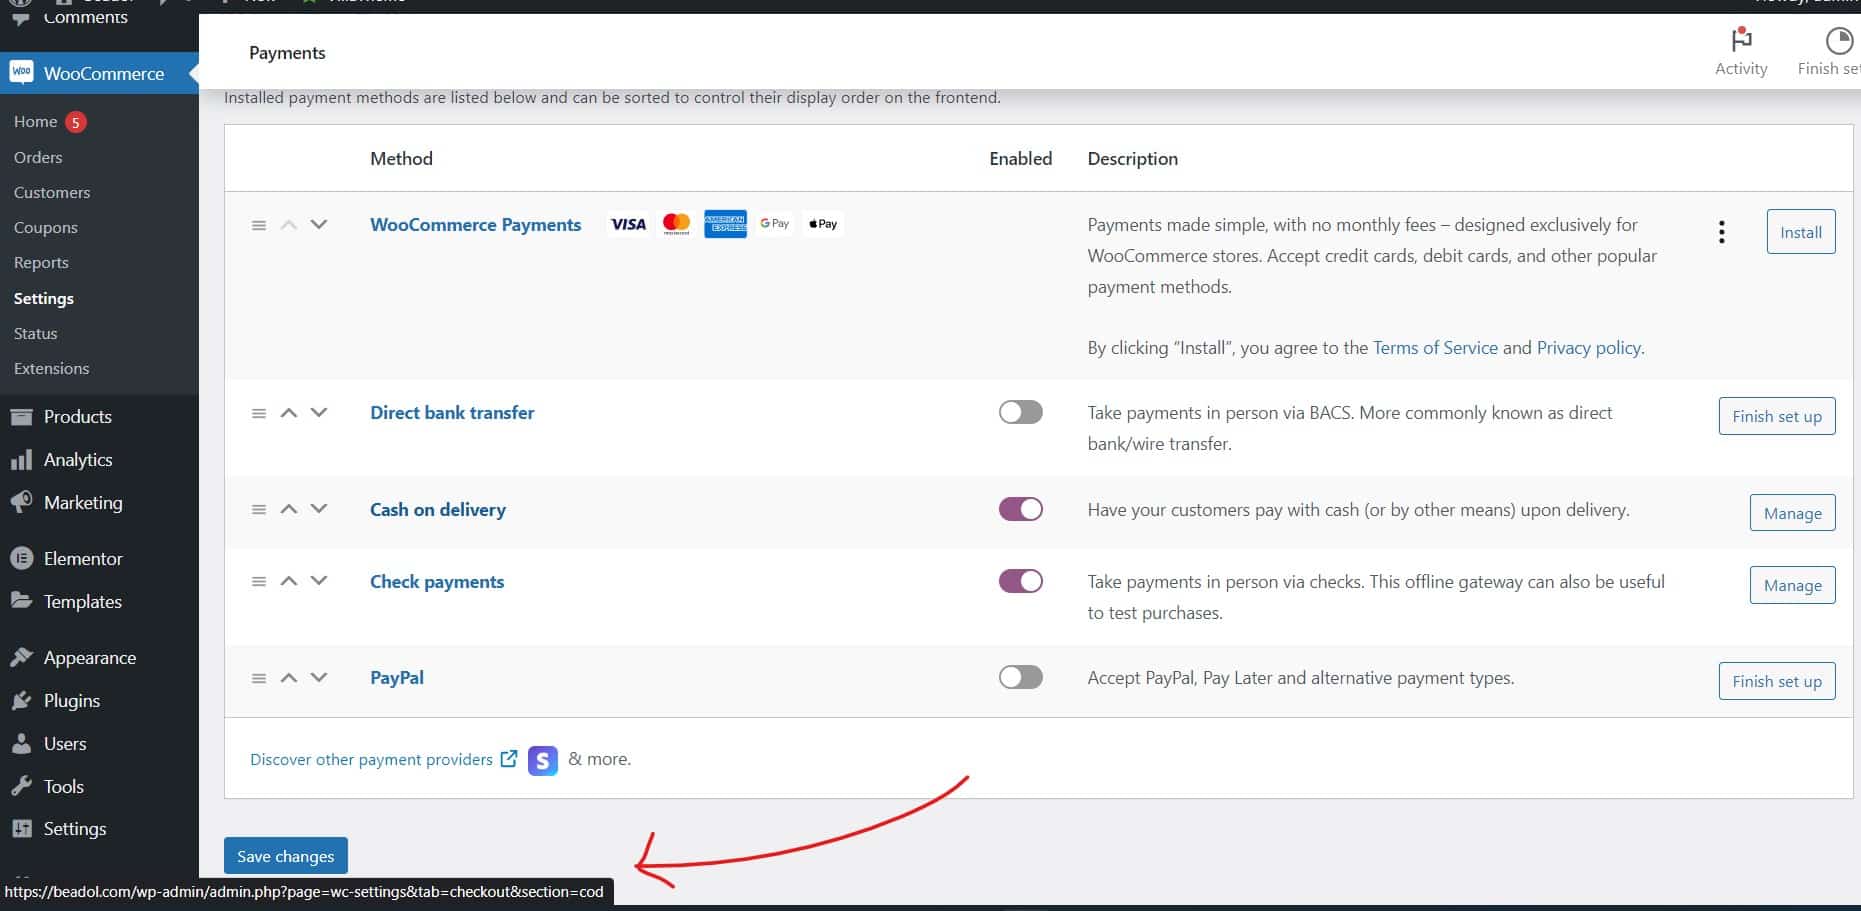
To obtain the payment gateway ID, you can follow these steps:
- Go to the WordPress dashboard and click on WooCommerce
- Click on Settings
- Click on the Payments tab
- Hover over the payment gateway you want the ID for and look at the URL at the bottom of the page. You should see something like “
§ion=cod“. In this case, the payment gateway ID is “cod”.
That’s it! Your checkout button text will now be customized based on the payment gateway selected by the customer. If you have more payment gateways, you can add more if statements and change the text as per the customer selection of payment gateway.
In conclusion, we’ve covered three essential topics that will help you customize your WooCommerce store and improve the shopping experience for your customers. First, We discussed how to change the Place Order button text, which is a small but important detail that can make a big difference in the checkout process.
Next, we explored how to change the Place Order button text based on product ID, which is useful if you want to personalize the text for specific products.
Finally, we learned how to change the Checkout button text based on payment gateway, which is important for providing clear and specific instructions to customers.
By implementing these customizations, you can create a more user-friendly and streamlined shopping experience for your customers, which can help increase conversions and brand identity.
We hope this tutorial was helpful. Comment below for further questions or additional assistance.

Rishad is a software engineer with a passion for web development. He has been working as a freelancer for the past 3 years, helping businesses and individuals create professional and functional websites. He is an undergraduate student of BSC in Software Engineering (Kingston UK). Rishad’s expertise lies in JavaScript/PHP/Wordpress/React/Django/Python, and he is constantly learning and updating his skills to stay on top of the latest trends and best practices in web development.