How to Integrate Microsoft Azure OpenAI with Laravel
Integrating the Microsoft Azure OpenAI API can transform your app’s functionality, enabling it to understand and generate human-like text. In this tutorial, I’ll Walk you through a step-by-step process on how to create and deploy an OpenAI model on Microsoft Azure and seamlessly integrate it into a Laravel application. By the end of this guide, you’ll have a powerful tool at your disposal to enhance your app’s user experience and capabilities. Ready to get started? Sign up for Microsoft Azure to follow along with the tutorial. Let’s dive in!
Note: If you are a student, you can access Microsoft azure services for free. Check azure for students for more information.
Step 1: Creating a resource group
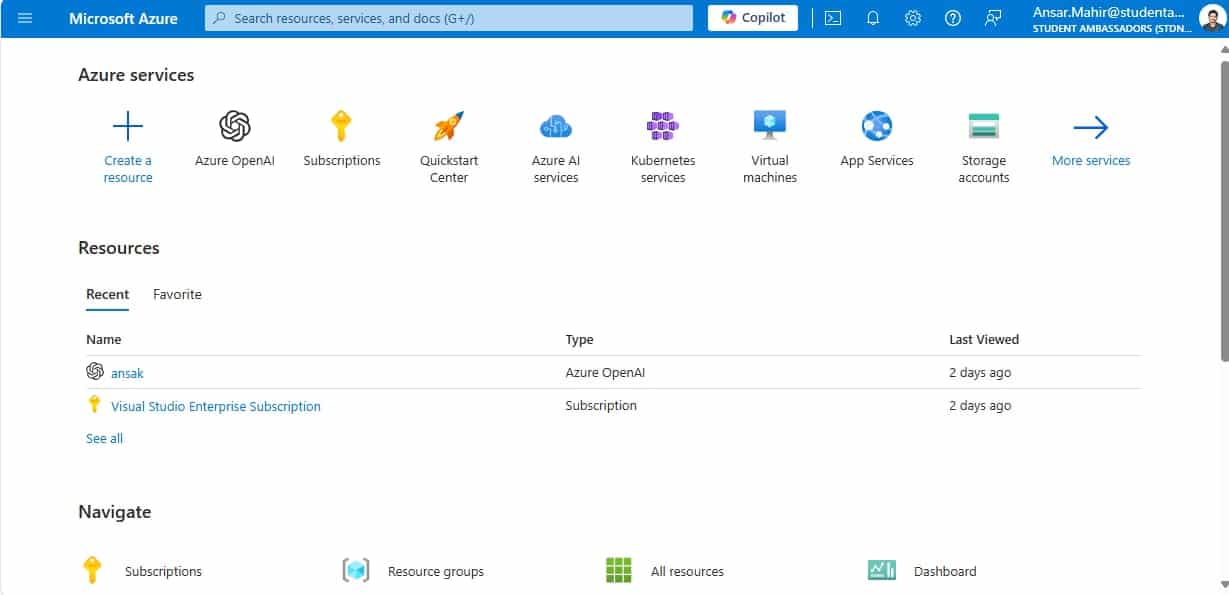
As you have successfully finished signing up, you will end up in the home screen of azure portal. In case you did not end up in the azure portal, please visit Home – Microsoft Azure.
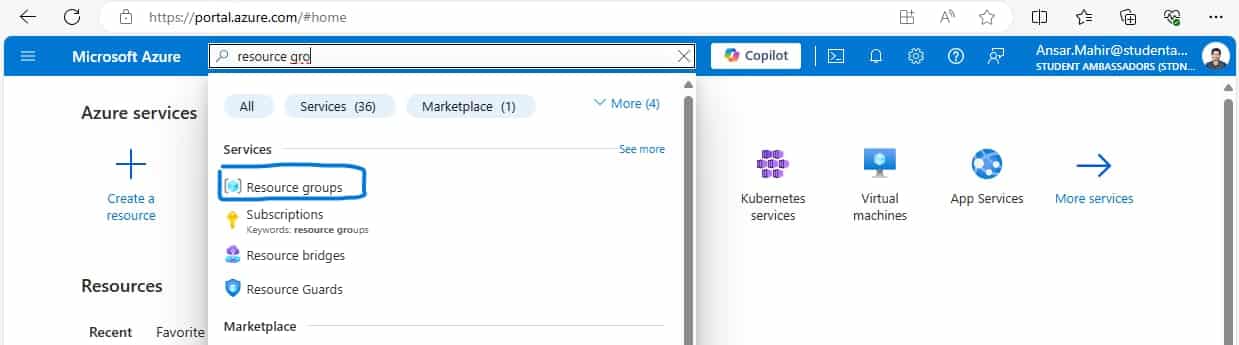
Once you are at homepage, search as ’resource groups’ in the search bar and click the resource groups.
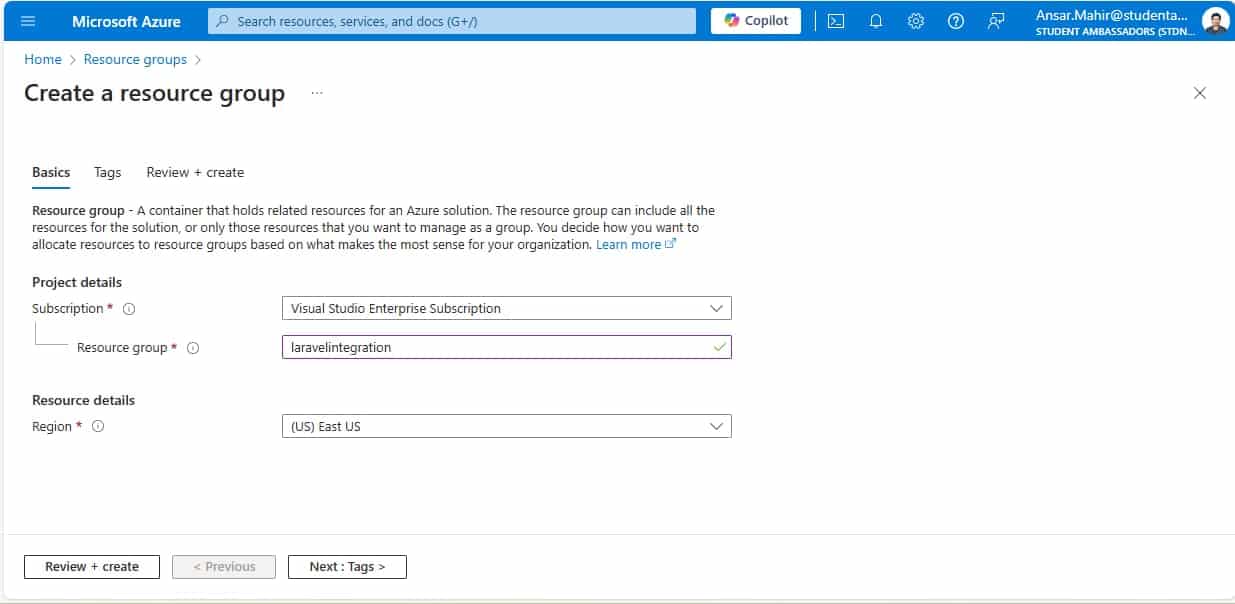
Once you are inside the resource groups, create a new resource group. The subscription field should already be selected. Give a name as you prefer for the resource group and choose a region. Click on ‘review+create’ button, a validation will happen in the background, and you should click the create button to finish creating the resource. Do not bother about tags, we do not need them for this tutorial.
Once finished, you will end up on the resource group page with the resource you have created.
Step 2: Creating a OpenAI service
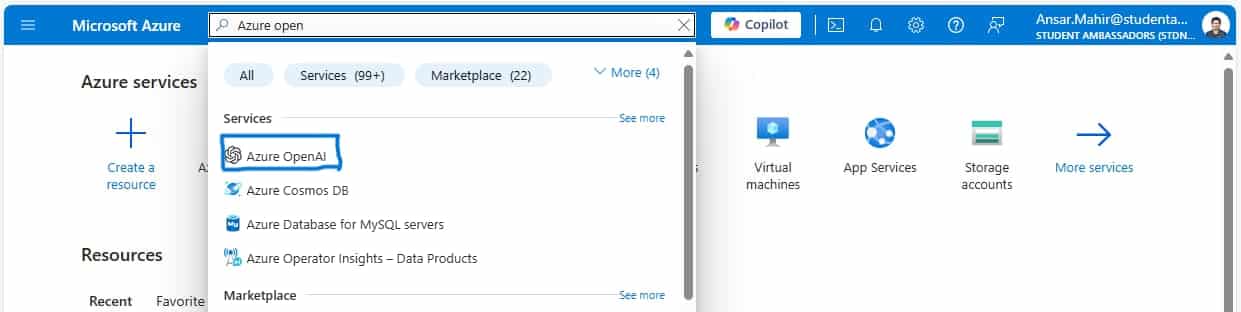
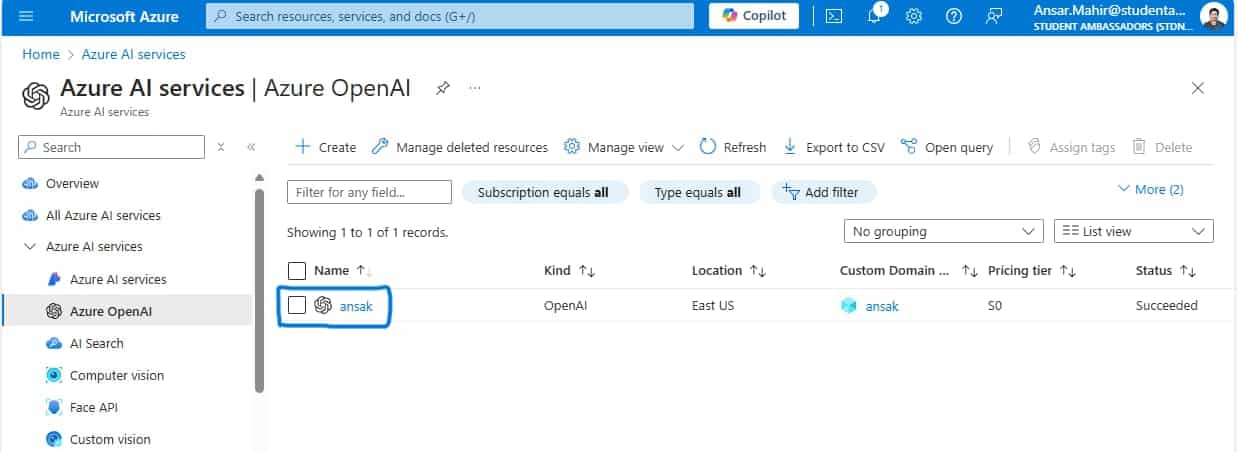
Once the resource group is created, search for ‘Azure OpenAI’ and click on create.
Note: Azure has limited access to Azure OpenAI, so if you are going to use Azure OpenAI for the first time, you must fill this form to get accepted to use Azure OpenAI services.
Once you have access to the OpenAI service, click on create model.
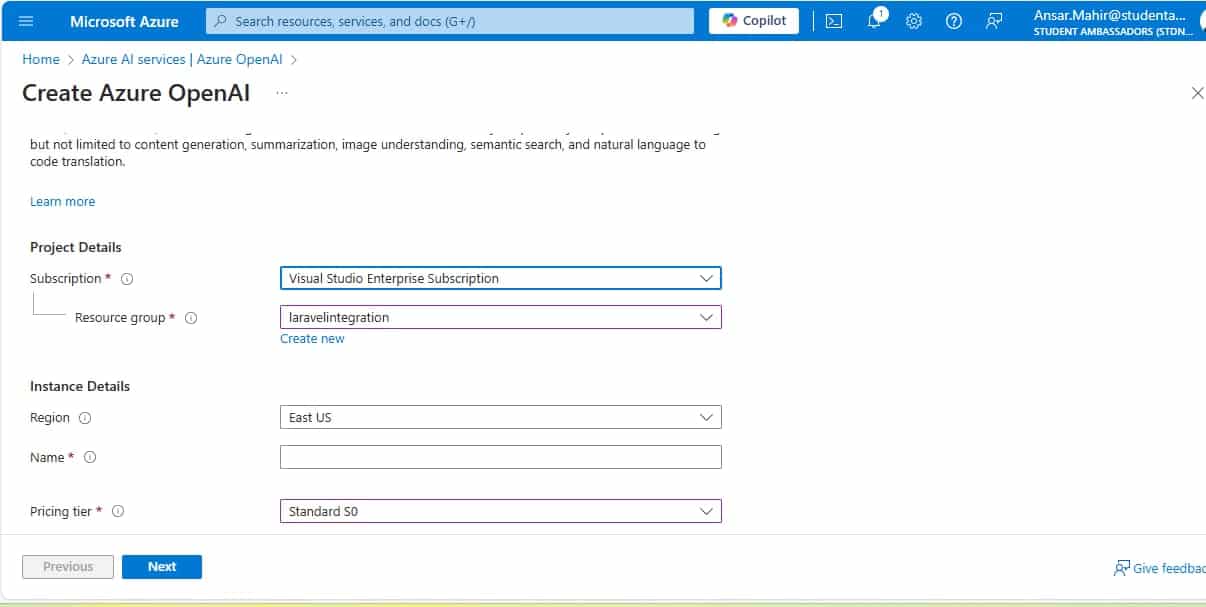
The subscription field will be pre-selected. For the resource group, select the resource group you have created in the earlier step.
Selecting a region differs according to your application needs. This is because not all the regions have all the models, you need to have an idea about the models that azure OpenAI offers and in which region they are offered. Check this article for information about azure OpenAI models and availability regions. In my case, I need the ‘Gpt-35-turbo-instruct’ model which is available in East US region.
Name field should have a unique name because it will be the custom domain name in the endpoint. The pricing tier usually will be ‘Standard S0’.
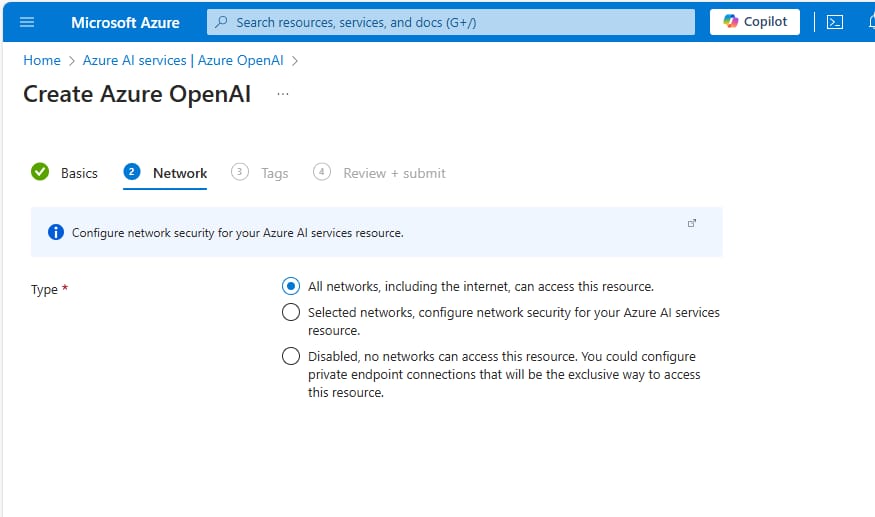
Once done click on next. In the network tab, select the first choice (Allowing the internet must be there so you can call the API from your application even though the IP address changes dynamically)
Click next and leave the ‘Tags’ tab as it is, now you can click on next and click on create in the Review+Submit tab. We have successfully created the Azure OpenAI model.
Step 3: Deploying a model in azure OpenAI service
The API keys can be retrieved even without deploying a model in the created azure OpenAI service, but there is no use in having API keys which does nothing. So, let’s deploy a model and then get the required data.
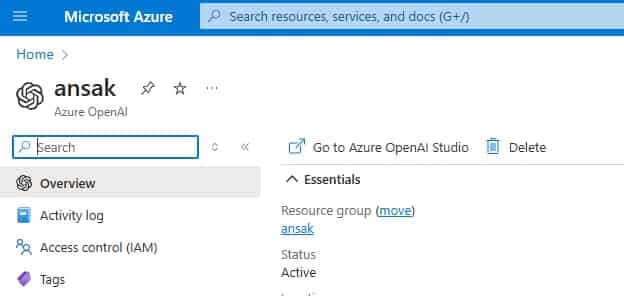
In the Azure OpenAI page, click on the model you have created.
Now click on Go to Azure OpenAI Studio.
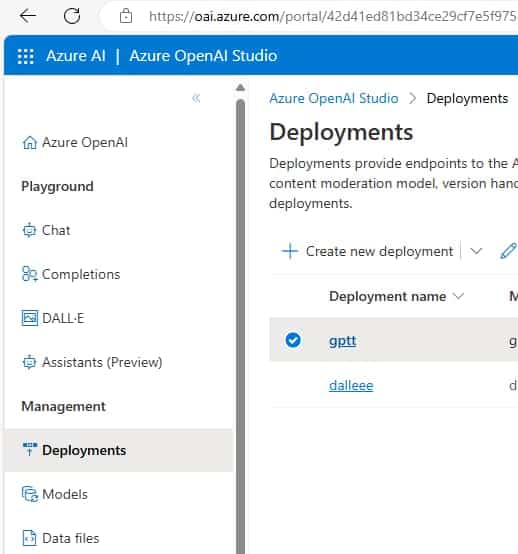
Once you reach the Azure OpenAI Studio, go to the deployment section using the left side bar and create a new deployment.
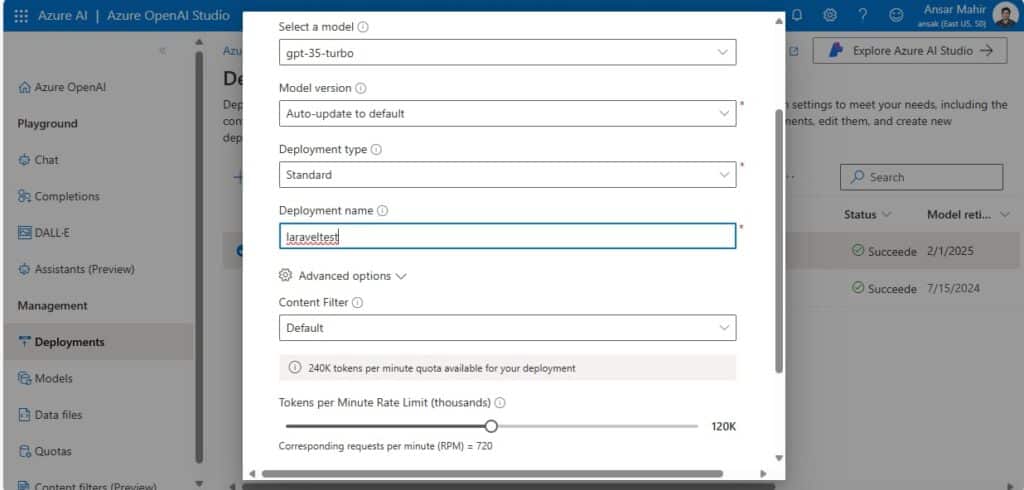
In the deploy model form, select your preferred model, set the version to auto-update, set the deployment type as standard and give a name to the deployment. Do not change anything under advanced tab. Just click create to deploy model.
Once the model is deployed, wait for 5 minutes before triggering the model. It usually takes 5 minutes for the model to work.
Step 4: Getting API Keys & Endpoint
After the successful deployment of the model, click on the ‘completions’ in the left pane and select your model on the page.
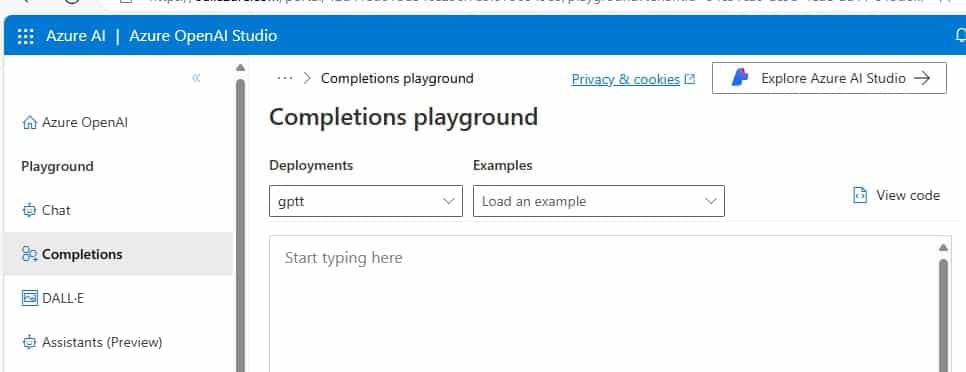
Click on the view code button in the right-side corner of the image to get the endpoint and API.

Copy your API key and the endpoint. As the code can be derived only for 4 languages, select curl as the language and copy the code.
Step 4: Convert the code to PHP (Laravel code)
Once you get the curl code, it can’t be directly used in your Laravel application. So below is the converted PHP/Laravel code for you.
$response= Http::withHeaders([
    'Content-Type' => 'application/json',
    'api-key' => 'Your_api_key',
])->post('https://openai_service_name.openai.azure.com/openai/deployments/deployment_name/completions?api-version=2023-09-15-preview', [
    "prompt" => "Who is the current president of srilanka?",
    "max_tokens" => 50,
    "temperature" => 1,
    "frequency_penalty" => 0,
    "presence_penalty" => 0,
    "top_p" => 0.5,
    "best_of"=>1,
    "stop" => null,
])->json();
This is how your curl code looks like when converted to Laravel. Compare with the curl code to get an understanding of the conversion. Now you can use the above code in your Laravel application.
Please change the your_api_key, openai_service_name and deployment_name with your own API key, OpenAI service name and deployment name.
Note: Api key should be specified as an environment variable. Using the key directly will create chances for it being accidentally exposed.
Calling the Azure OpenAI API directly through Laravel Route
This is an example of creating a route and calling the OpenAI API to get response for the prompt.
Route::get('/ai',function(){
$apiKey = config('services.my_service.api_key');
$response = Http::withHeaders([
'Content-Type' => 'application/json',
'api-key' => $apiKey, // Replace 'YOUR_API_KEY' with your actual API key
])->post('https://ansak.openai.azure.com/openai/deployments/gptt/completions?api-version=2023-09-15-preview', [
"prompt" => "Who is the president of Sri Lanka?",
"max_tokens" => 50,
"temperature" => 0.2,
"frequency_penalty" => 0,
"presence_penalty" => 0,
"top_p" => 0.5,
"best_of" => 1,
"stop" => null,
])->json();
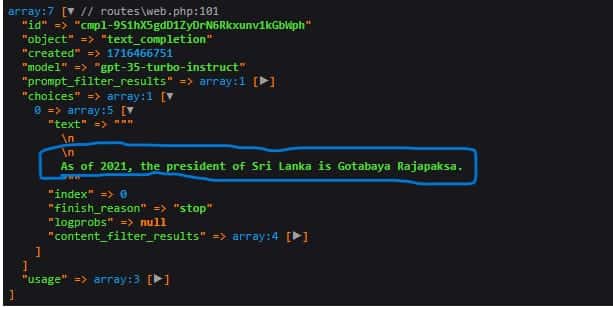
dd($response);
});Once you set up this route in your Laravel application and goes to the route, you will see the replay from the Azure OpenAI model in the die dumped response.
To get this response directly saved to a PHP variable, you can use the code below and place it before the ‘dd();’ function in the function calling (route) code.
$correctAnswer = $response['choices'][0]['text'];Using the Azure OpenAI API to create value in your application
The Azure OpenAI integration can create values at many points in the flow of your application. For example, Let’s take an application which is built for users to test their knowledge before sitting for competitive exams. So, the application gives the chance for the users to try out past paper questions according to certain business logics.
Once a user gives a wrong answer for a MCQ question, Usually the typical applications just show the right answer. But using the Azure OpenAI, you can give a brief description to educate the user further to give him the root idea of solving the problem.
Below is a sample example of how the application does it in the backend and fronted
Below is a controller function specified in a Laravel controller. We invoke this function whenever a user gives a wrong answer.
public static function getCorrectAnswer($request)
    {
        $apiKey = config('services.my_service.api_key');
        $response = Http::withHeaders([
            'Content-Type' => 'application/json',
            'api-key' => $apiKey, // Replace 'YOUR_API_KEY' with your actual API key
        ])->post('https://ansak.openai.azure.com/openai/deployments/gptt/completions?api-version=2023-09-15-preview', [
            "prompt" => "{{$request}} explain briefly",
            "max_tokens" => 100,
            "temperature" => 0.2,
            "frequency_penalty" => 0,
            "presence_penalty" => 0,
            "top_p" => 0.5,
            "best_of" => 1,
            "stop" => null,
        ])->json();
        Log::info('API Response: ' . json_encode($response));
        $correctAnswer = $response['choices'][0]['text'] ?? 'No answer available';
        return $correctAnswer;
    }
We use livewire lazy loading technique to invoke the function, below in order are the livewire code in the blade template, livewire component function and component view.
<div >
 <livewire:gpt-answer :description="$question->description" lazy="on-load" />
</div>
class Gptanswer extends Component
{
public $description;
public $correctAnswer;
public function mount($description)
{
$this->description = $description;
}
public function loadCorrectAnswer()
{
if (!$this->correctAnswer) {
$this->correctAnswer = ReviewController::getCorrectAnswer($this->description);
}
public function render()
{
return view('livewire.gptanswer');
}
}<div wire:init="loadCorrectAnswer">
@if($correctAnswer)
<span class="text-bold">
{{ $correctAnswer }}
</span>
@endif
</div>Below is a small video showing how it works in the Laravel web application frontend.
PS – Sorry about the CSS of the application. It’s just messed up as I’m still in the development process of the application
By following this guide, you’ve successfully integrated the Microsoft Azure OpenAI with your Laravel application, unlocking powerful AI (Artificial Intelligence) capabilities to enhance your app’s value. The article touches only the outer surface of azure and its capabilities, Sign up for Microsoft Azure today to explore the magic of tech!

I’m Ansak Mahir from Sri Lanka. Technology enthusiast from a young age. Currently an undergraduate of BSC in Software Engineering (Kingston UK) and BSC (hons) in Information Technology & Management (University of Moratuwa). I love blogging and spreading the knowledge in a unique perspective. I’m also a reputed freelancer for web design and development