1. What is a Child Theme in WordPress?
A child theme in WordPress is a sub-theme that inherits the functionality and styling of its parent theme. In other words, a child theme is a modified version of an existing theme, also known as the parent theme.
By creating a child theme, you can customize your website’s appearance and functionality without affecting the original theme’s core files.
2. Why Should You Create a Child Theme?
Using a child theme has several benefits for your website. One of it is the customization that can be achieved through a child theme. You can make any changes to the website’s design without altering the original theme’s code with a child theme. This means you can modify the design to suit your needs without worrying about breaking the theme or losing your changes during an update.
Additionally, using a child theme makes it easier to maintain your website. Since it inherits the functionality of the parent theme, you can update the parent theme without losing your customizations.
Finally, creating a child theme can enhance your website’s security. Any customizations you make will not be lost during an update, and you can add security features to your child theme to protect your website from attacks.
Overall, using a child theme can help you to make the necessary changes to your website’s design, maintain its functionality, and ensure its security.
3. How to Create a Child Theme in WordPress
Creating a child theme in WordPress is a straightforward process. Here are the steps you need to follow:
Step 1: Create the Child Theme Folder
Create a new folder in your WordPress themes directory and give it a name that identifies it as a child theme. You can easily access the themes directory by installing Wp File Manager plugin or from your Cpanel.
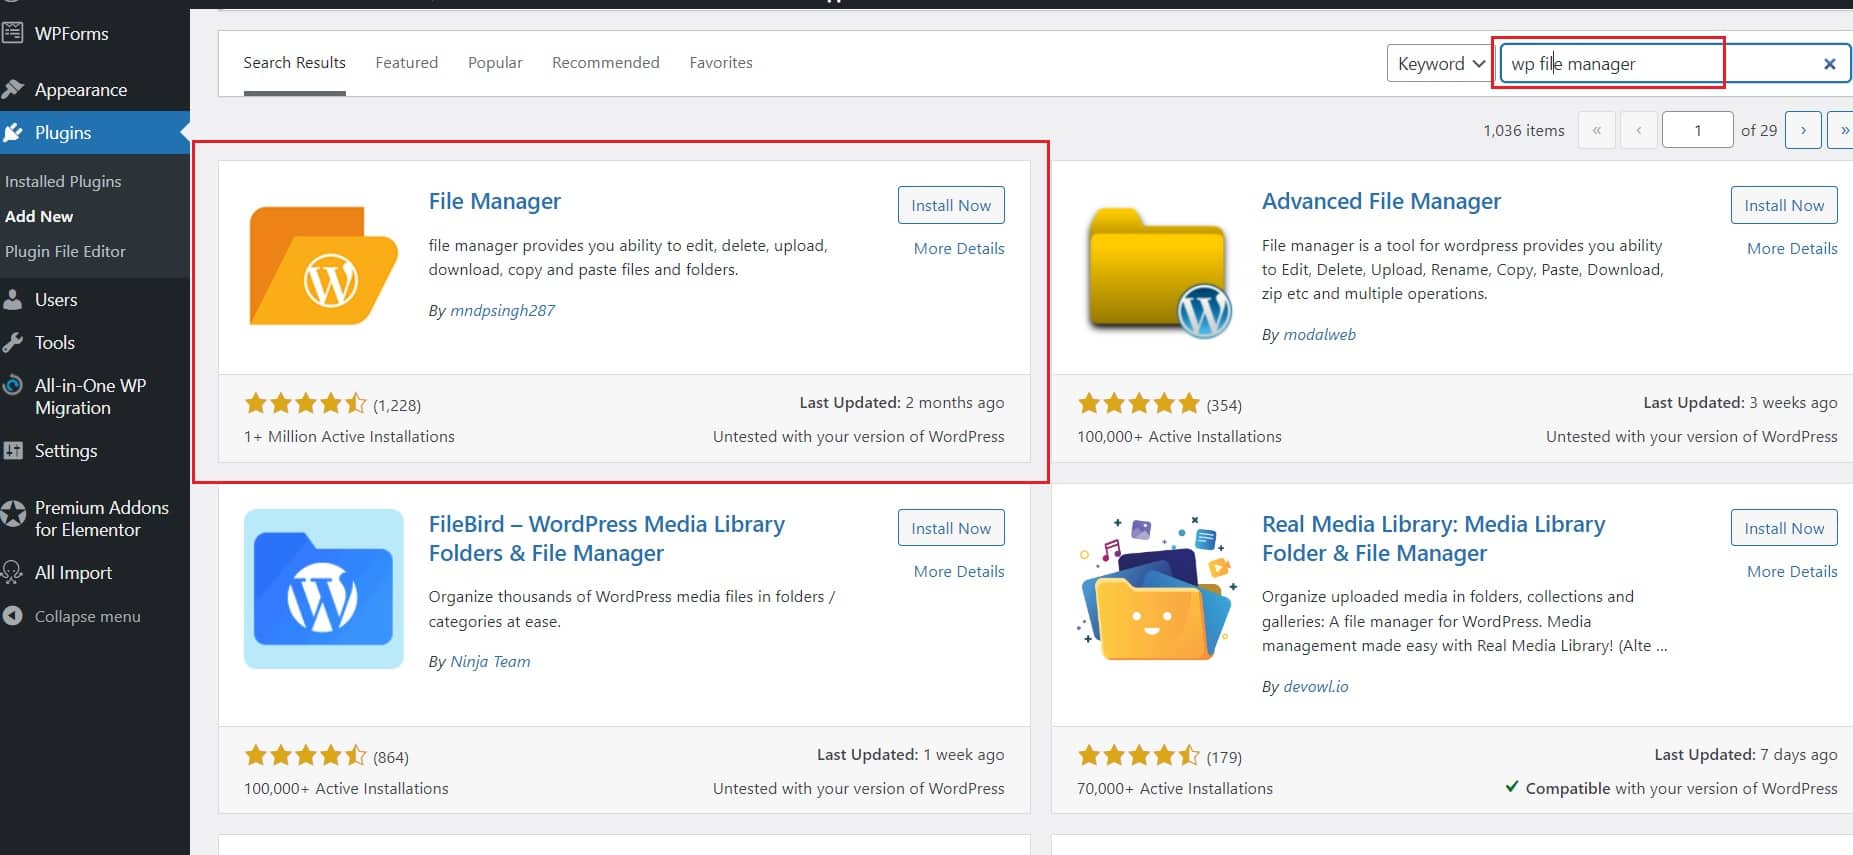
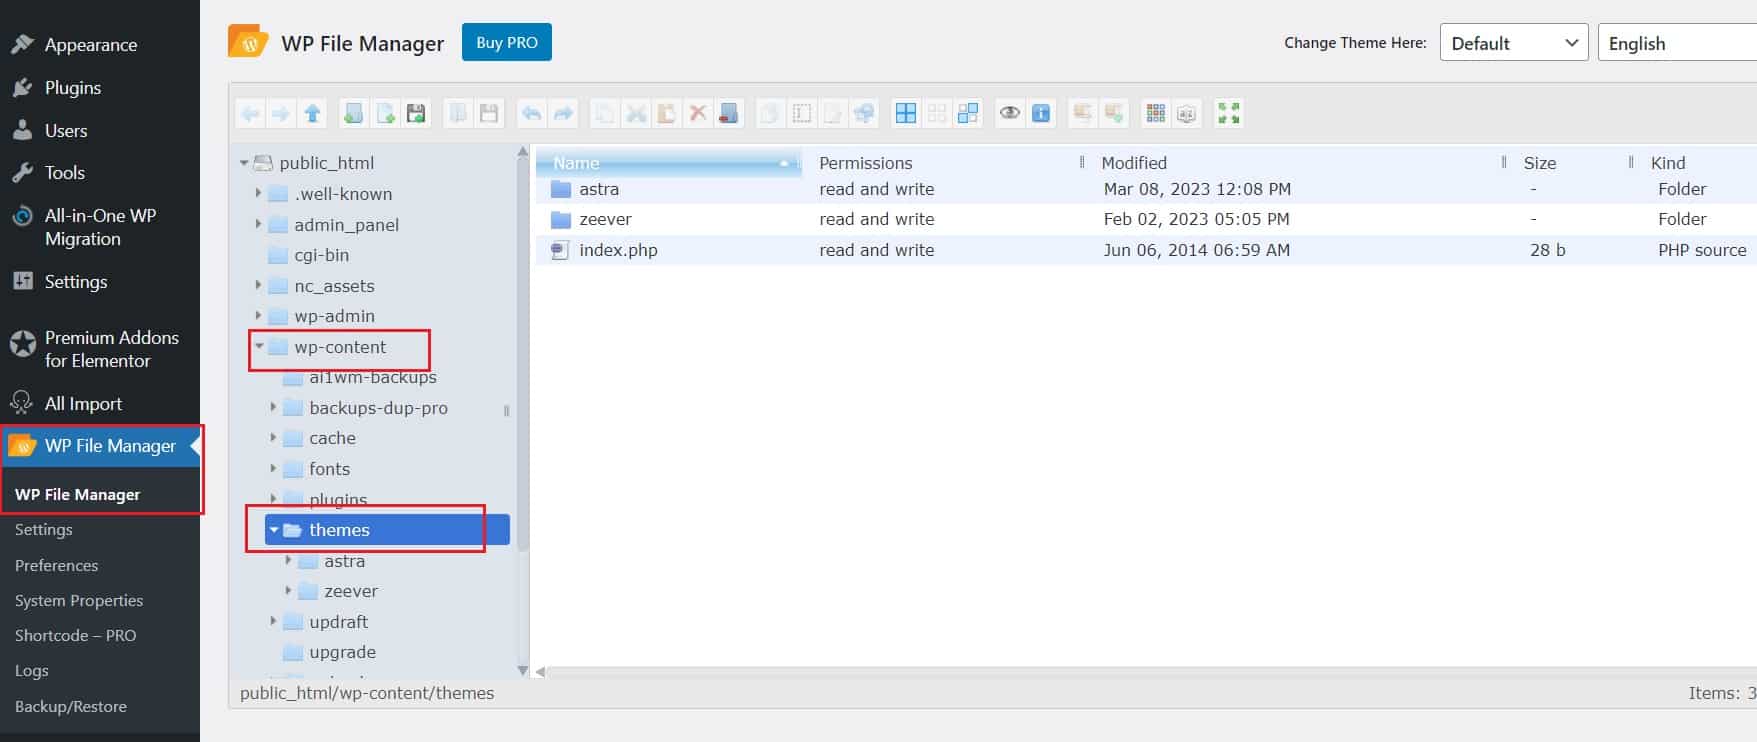
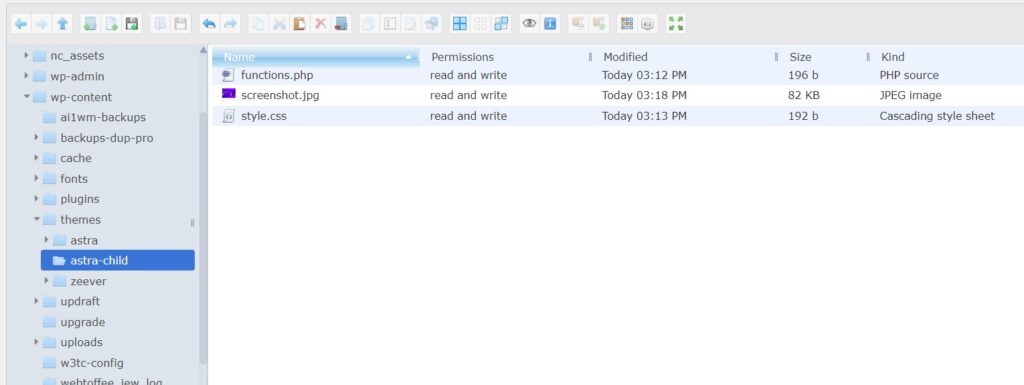
Create a new folder in your WordPress themes directory by visiting to public_html > wp-content > themes and give it a name that identifies it as a child theme.
For example if your parent theme is called astra you can name your child theme astra-child as shown in the below image
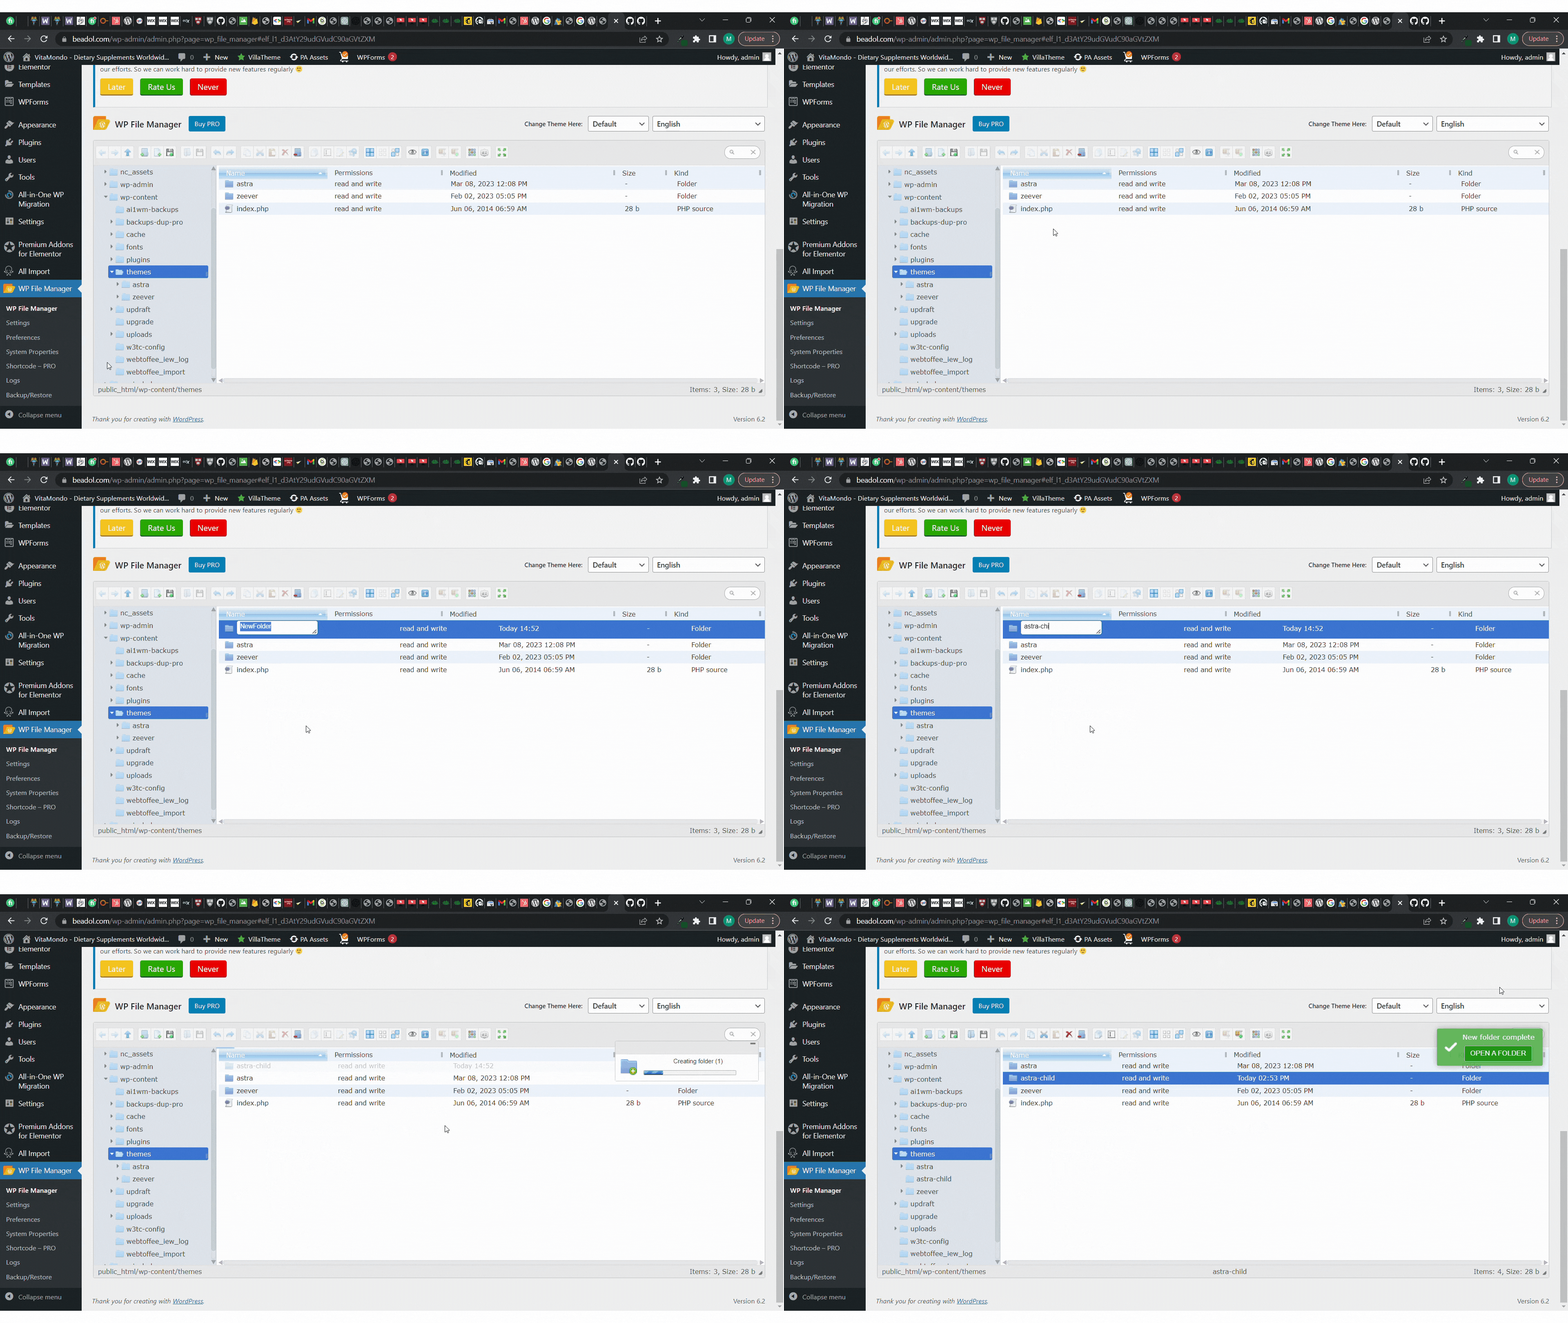
Step 2: Create a Stylesheet
Create a new file in your child theme’s folder and name it style.css. This file will contain the code that specifies your child theme’s styles. In the header of the style.css file, you need to add the following code:
/*
Theme Name: Astra Child
Template: astra
Theme URL: https://LetsKnowTech.com/astra-child/
Description: Astra Child Theme
Author: Author Name
Author URI: https://example.com
Version: 1.0.0
*/
This code specifies the name of your child theme and the name of its parent theme and other information about it. In our case, the parent theme is “astra“.
Step 3: Enqueue the Parent Theme’s Stylesheet
To inherit the styles of your parent theme, you need to enqueue its stylesheet in your child theme’s functions.php file. Create a new file in your child theme’s folder and name it as functions.php. Add the following code to the file you created:
<?php
function my_theme_enqueue_styles() {
    wp_enqueue_style( 'parent-style', get_template_directory_uri() . '/style.css' );
}

add_action( 'wp_enqueue_scripts', 'my_theme_enqueue_styles' );
?>
The above code tells WordPress to load the parent theme’s stylesheet before the child theme’s stylesheet.
Step 4: Activate Your Child Theme
Congratulations! You have successfully created a child theme in WordPress. Go to your WordPress dashboard and navigate to Appearance > Themes. You should see your new child theme listed there. Click the “Activate” button to activate your child theme.
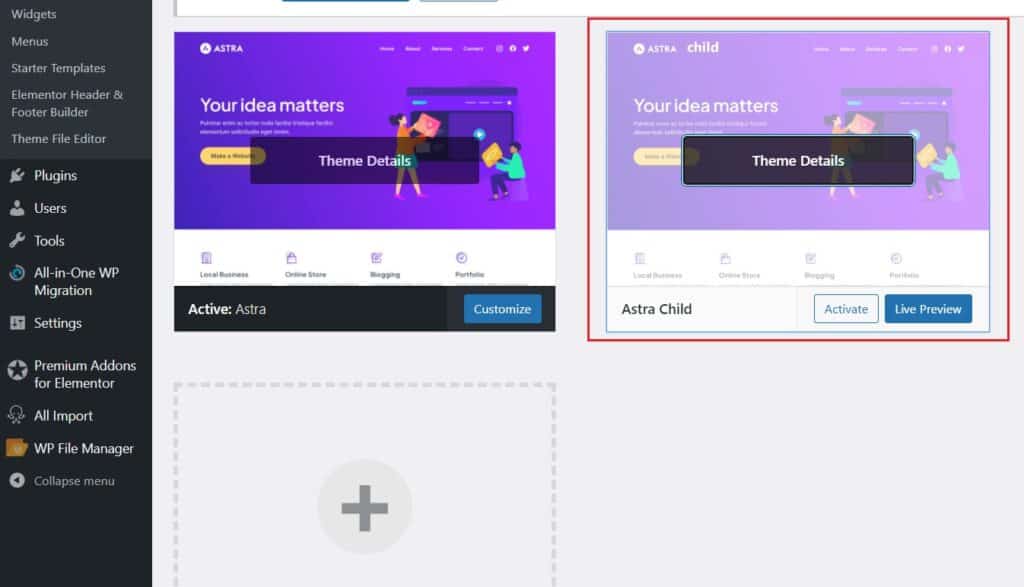
Note: Just wanted to give you a heads up that you can actually control the image thumbnail that appears for your theme. To do so, all you need to do is upload an image named ‘screenshot.jpg’ or ‘screenshot.png’ to your child theme’s folder. It’s totally optional, but it can make your dashboard look a lot nicer!
4. How to create a child theme in WordPress using a plugin
If you’re not comfortable with coding, you can still create a child theme in WordPress using a plugin. There are several plugins available that make it easy to create and customize child themes without any coding knowledge.
One popular plugin for creating child themes is the Child Theme Configurator. This plugin allows you to create a child theme from your existing theme with just a few clicks. Here’s how to create a child theme using the Child Theme Configurator plugin:
Step 1: Install and Activate the Child Theme Configurator Plugin
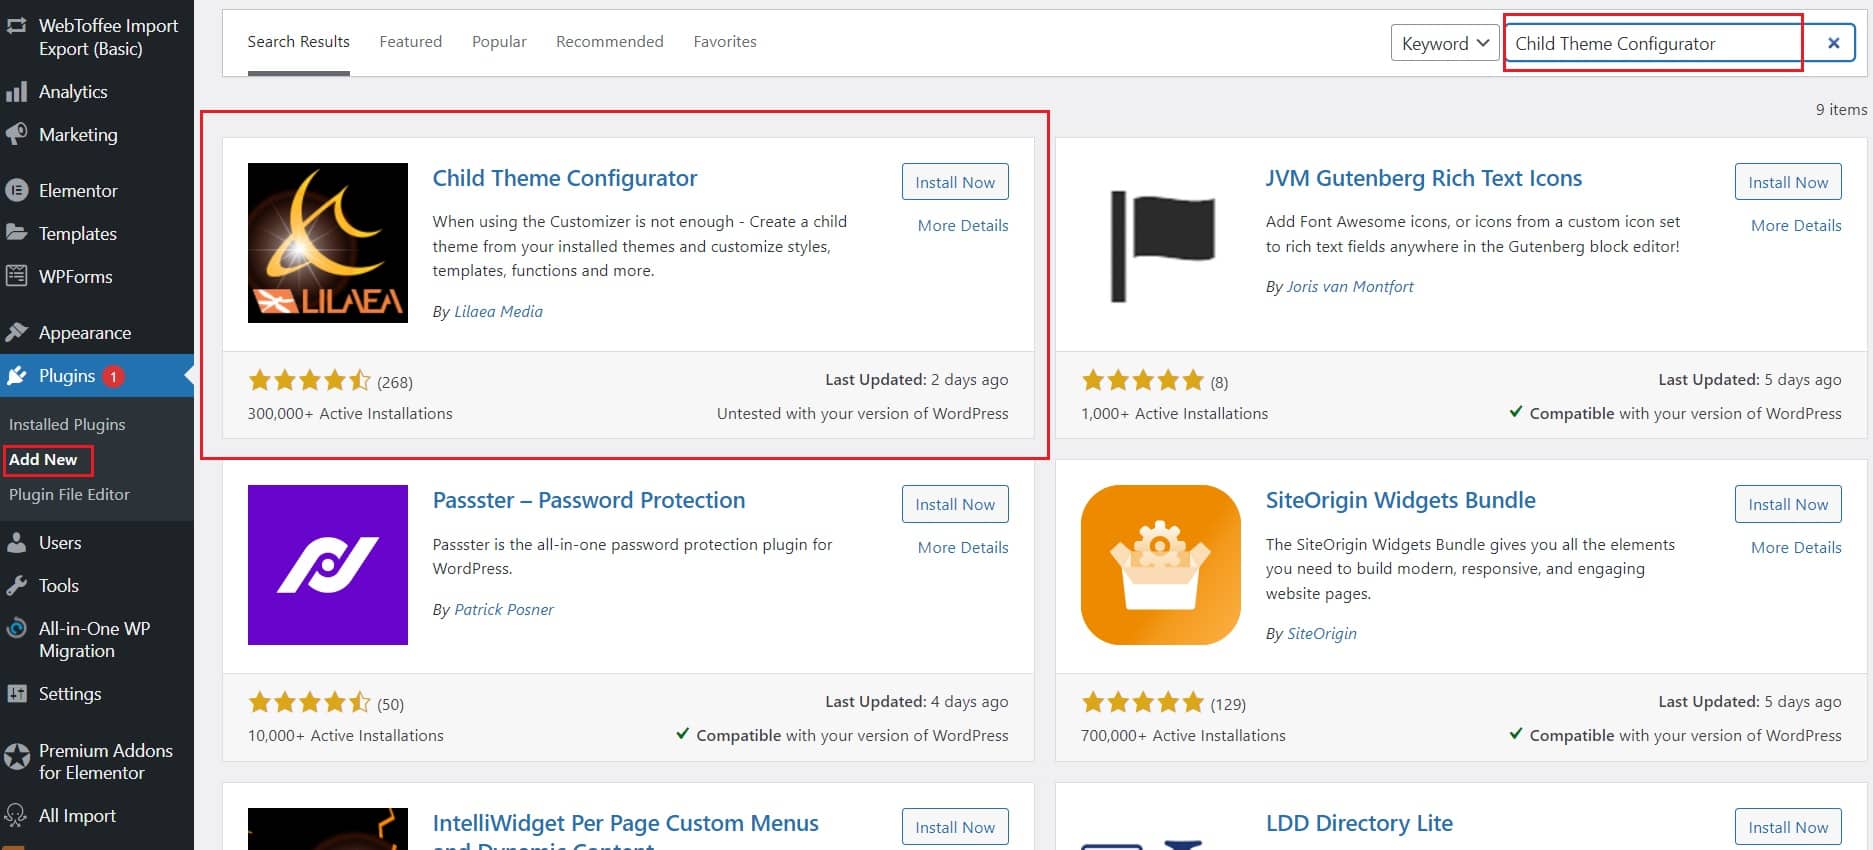
The first step is to install and activate the Child Theme Configurator plugin. To do this, go to Plugins > Add New in your WordPress dashboard, search for Child Theme Configurator, and install and activate the plugin.
Step 2: Create a New Child Theme
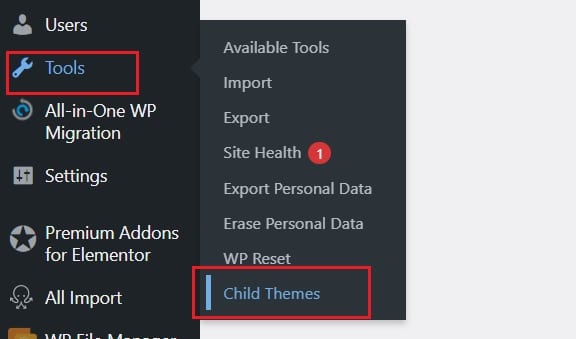
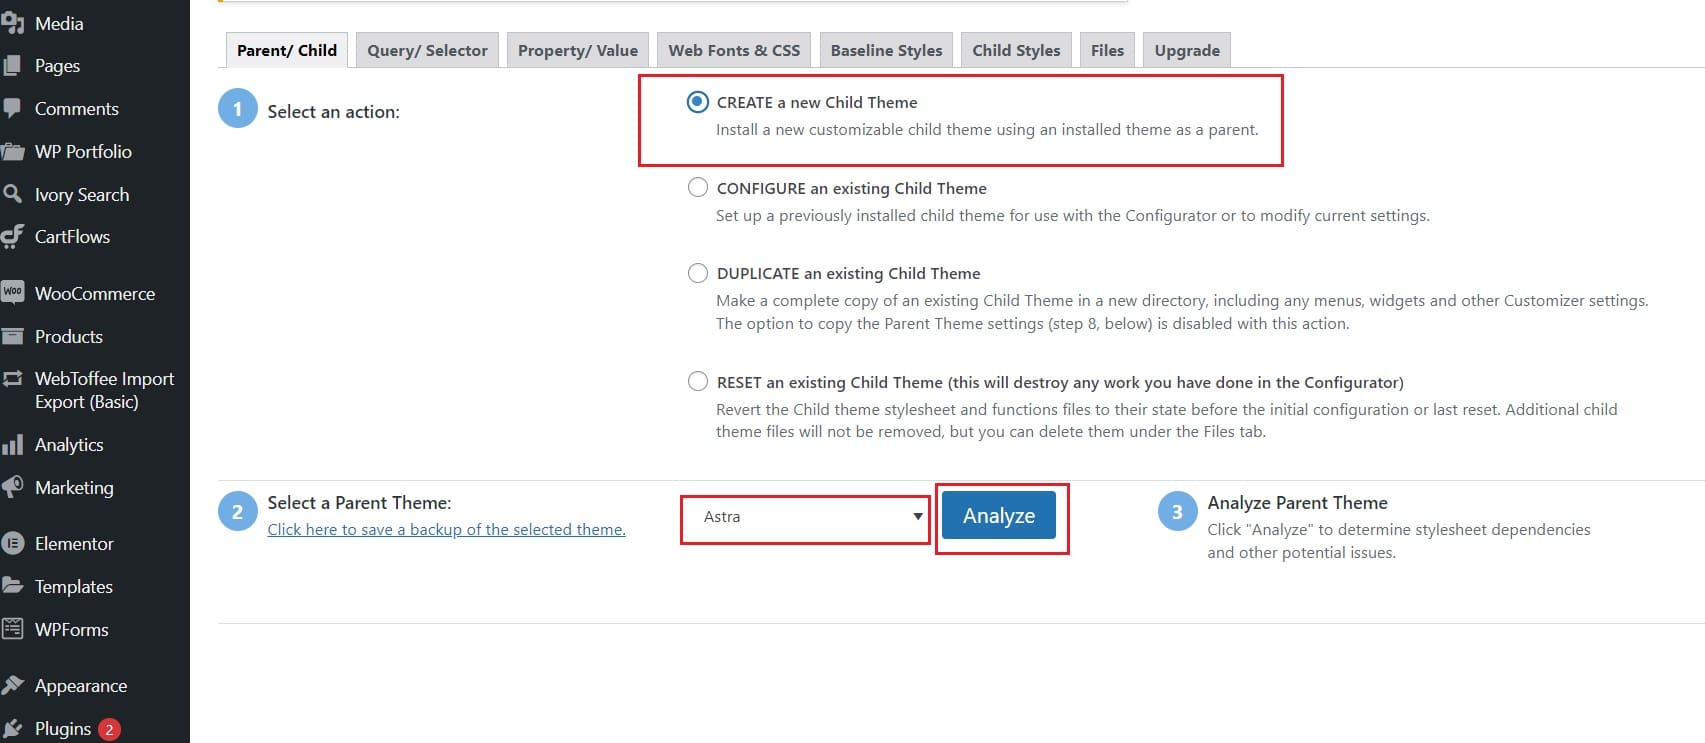
Once you have activated the plugin, go to Tools > Child Themes in your WordPress dashboard. Here, you will see the Child Theme Configurator interface, which will guide you through the process of creating a child theme.
To create a new child theme, select Create a new Child Theme option. Select the parent theme you want to use and click on the Analyze button.
Step 3: Customize Your Child Theme
Once you have analyzed the parent theme, you can start customizing your child theme. You can change the name of your child theme, add a description, and modify the theme options. You can also add custom CSS code to your child theme to make further design changes.
Step 4: Save and Activate Your Child Theme
Once you have finished customizing your child theme, click on the “Create New Child Theme” button. This will create a new folder in your themes directory with your child theme files.

Now you can activate your child theme by going to Appearance > Themes in your WordPress dashboard.
Creating a child theme in WordPress using a plugin is a quick and easy way to make customizations to your website’s design without risking breaking the original theme. The Child Theme Configurator plugin makes the process even simpler, guiding you through the steps of creating a child theme and customizing it to your liking. By using a child theme, you can maintain your website’s functionality, ensure its security, and make the necessary changes to your website’s design.
5. Updating Your Child Theme
Whenever your parent theme is updated, you should check to see if your child theme needs to be updated as well. If your customizations are not affected by the update, you do not need to make any changes to your child theme. However, if the update includes changes that affect your child theme, you will need to update it accordingly.
To update your child theme, you can follow these steps:
- Download the latest version of your parent theme.
- Compare the files in your child theme’s folder to the new version of the parent theme. Identify the files that need to be updated.
- Make a backup of your child theme’s folder.
- Replace the outdated files in your child theme’s folder with the new files from the parent theme.
- Test your website to ensure that everything is working as expected.
Final Thoughts
Creating a child theme in WordPress is a simple and effective way to customize your website’s appearance and functionality. By following the steps outlined in this article, you can create your own child theme.
Remember to always make a backup of your child theme before making any changes, and to keep your child theme up to date with the latest version of your parent theme.
-
How to create a child theme in WordPress using a plugin
1.Install and Activate the Child Theme Configurator Plugin
2.go to Tools > Child Themes
3.select Create a new Child Theme option
4.Select the parent theme you want to use
5.click on the Analyze button.
6.click on the “Create New Child Theme” button

I’m Ansak Mahir from Sri Lanka. Technology enthusiast from a young age. Currently an undergraduate of BSC in Software Engineering (Kingston UK) and BSC (hons) in Information Technology & Management (University of Moratuwa). I love blogging and spreading the knowledge in a unique perspective. I’m also a reputed freelancer for web design and development


